GStreamer is a powerful tool that is available to software developers. In this tutorial, I will show you how you can utilize GStreamer and Video4Linux to implement an RTSP server to stream video from a standard Raspberry Pi camera over a network.
What is Video4Linux (V4L)?
V4L is a collection of device drivers that allow real-time capture of video from video devices on Linux systems. V4L effectively abstracts the interface of a video camera into a device in the device tree of Linux (such as “/dev/video0”). To use that device in an application, you would simply call that device name.
What is GStreamer?
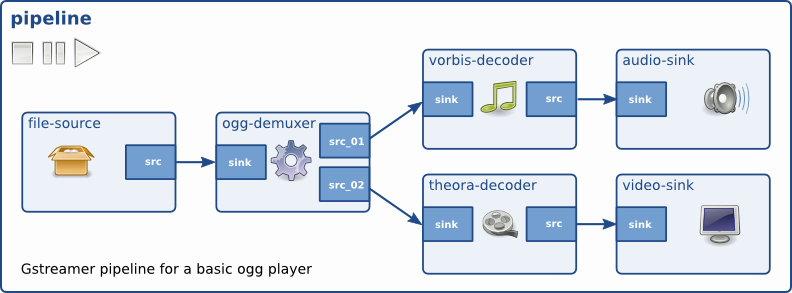
GStreamer is a pipeline-based multimedia framework. Basically, you start with a media source (video, audio), modify it as needed, and eventually pipe it into a module that consumes data, called a “sink”. The sink can play the media on your computer, stream it over a network, or even save it to a file. GStreamer is pretty excellent in terms of configurability and systems programming, and has a lot of plugins and modules built in.
Getting Started:
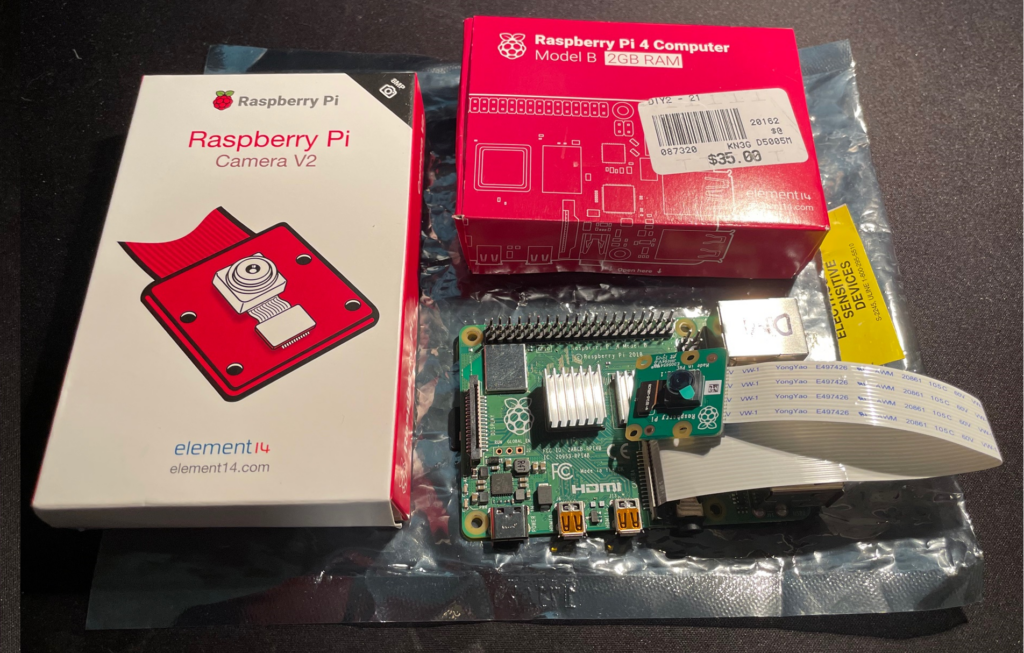
For this tutorial, I will be using:
- Raspberry Pi 4 Model B 2GB Single Board Computer (SBC)
- Raspberry Pi Camera V2
- A second PC
I am using a Raspberry Pi 4, but earlier versions should work as well (but I’ve not tested this). This tutorial will be based on the standard version of Raspbian available at the time of writing. This tutorial will not go over initial setup of a Raspberry Pi (SD Card flashing, etc). Instead, I will refer you to the official start guide. Your second PC should be on the same network (WiFi or Ethernet) as the Raspberry Pi.
Raspberry Pi Configuration:
I found it easier to hook up the Raspberry Pi to a monitor initially, rather than trying to configure and test video things headless over SSH. You can follow this tutorial without having a monitor, but you wont be able to see your camera in the “Test your camera” section, and it may complicate things if you need to troubleshoot. Anyway, here are the steps:
1. Connect to the network that you wish to stream across.
Pick a network (wireless or otherwise) that your second PC is also connected to. If you’re using a home network, your router will typically have a DHCP server that will automatically assign you an IP Address. If you’re using a network without a DHCP server (like in the private space), you should set an IP Address manually.
2. Determine IP Address
Once connected, find the terminal and type in:
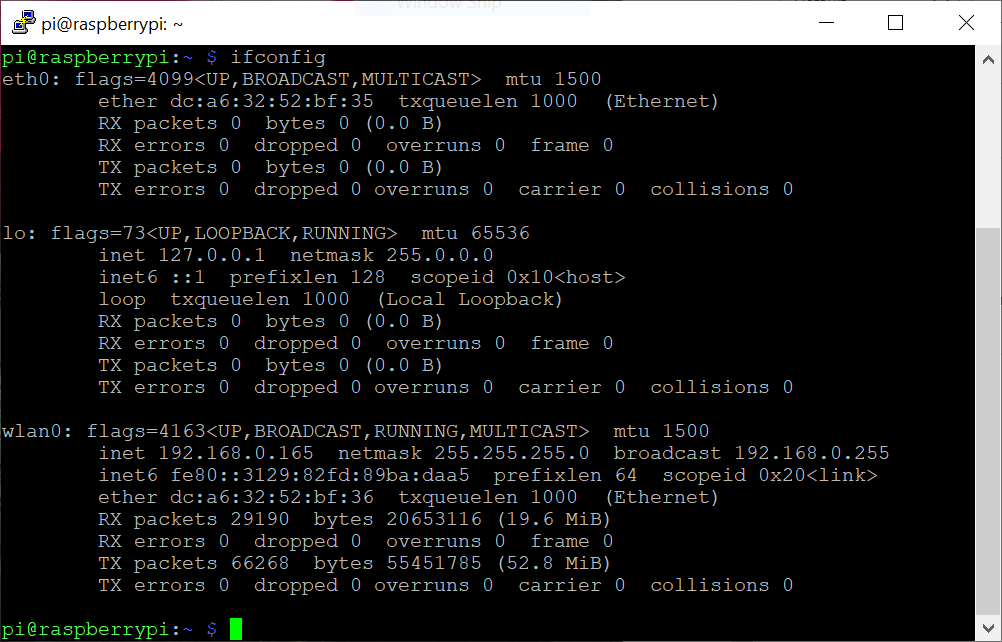
ifconfig
This will return the assigned IP Addresses of all of your network interfaces. If you are using WiFi, write down the IP Address for wlan0. If you’re using Ethernet, write down the IP for eth0. I’m using WiFi, so the IP address I need to worry about is 192.168.0.165.
3. Enable your camera interface
In a terminal window, type in:
sudo raspi-config
This will take you into the Raspberry Pi Configuration Tool.
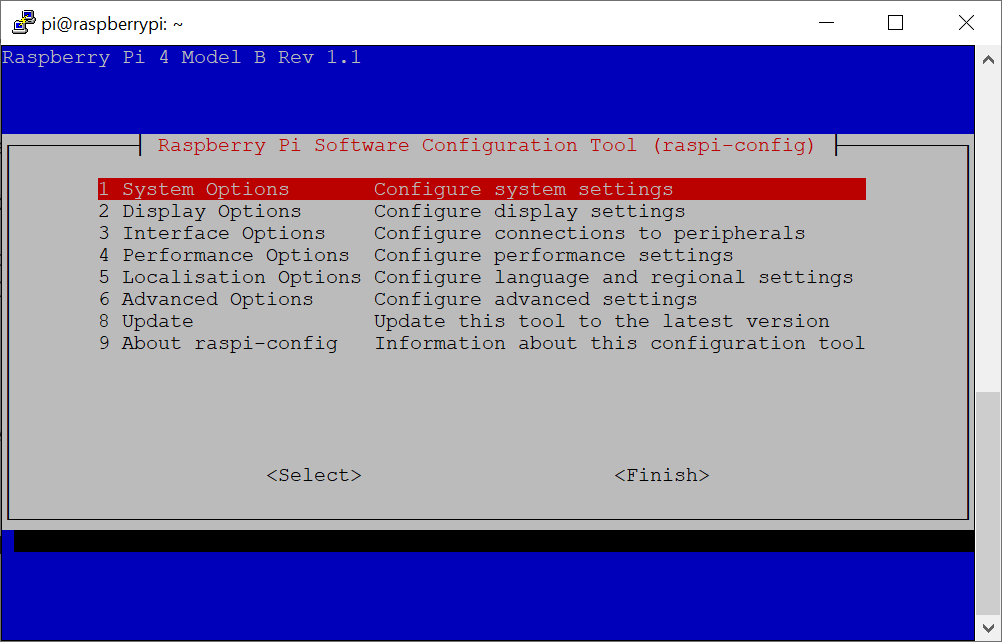
With arrow keys, go to “3 Interface Options”
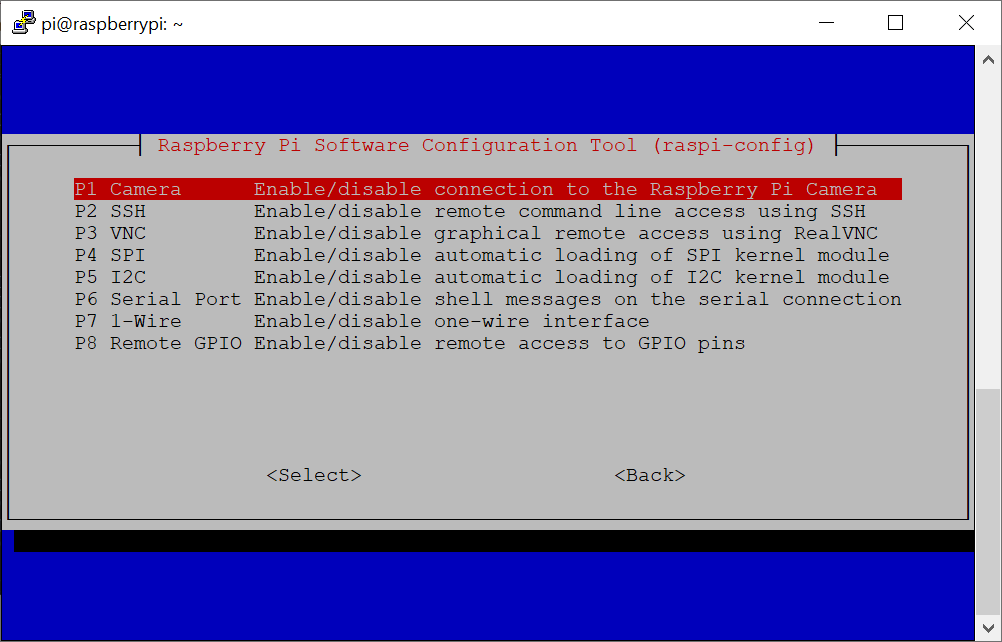
Select camera interface, and follow the prompts to enable it.
Installing Everything the Lazy Way
At this point, if you know what you’re doing and don’t want to go through every step, feel free to clone my repository onto your Pi and run a few automated bash scripts:
git clone https://github.com/dmays-io/rpi-rtsp-gstreamer
cd rpi-rtsp-gstreamer
You may need to set the scripts as executable:
chmod +x *.sh
Run the install script:
./picam_rtsp_install.sh
This script will run through all of the steps below. Once it’s done, you can test your Raspberry Pi’s camera using:
./test_picam.sh
Next, to run the RTSP server, do the following command:
./picam_rtsp.sh
That’s it!
Installing GStreamer
The next set of steps involves installing GStreamer on your Raspberry Pi. Before you do this, make sure your Raspberry Pi has been updated and has the latest lists:
apt update -y
apt upgrade -y
Next, install GStreamer-1.0:
apt-get install gstreamer1.0-tools
Install RTSP libraries:
apt-get install libgstrtspserver-1.0-dev gstreamer1.0-rtsp
Install git and build related items:
apt-get install git build-essential autoconf automake autopoint libtool pkg-config
Install other GStreamer libraries and plugins
apt-get install gtk-doc-tools libglib2.0-dev libgstreamer1.0-dev libgstreamer-plugins-base1.0-dev
Test out your camera and installation
This section assumes you are using the Raspberry Pi with a monitor, keyboard, and mouse (not headlessly via SSH). In a terminal window, type the following command:
gst-launch-1.0 -vv v4l2src device=/dev/video0 ! video/x-raw,width=640,height=480,format=I420,framerate=30/1 ! autovideosink sync=false
If this command runs successfully, you should see a window showing video from your camera pop up.
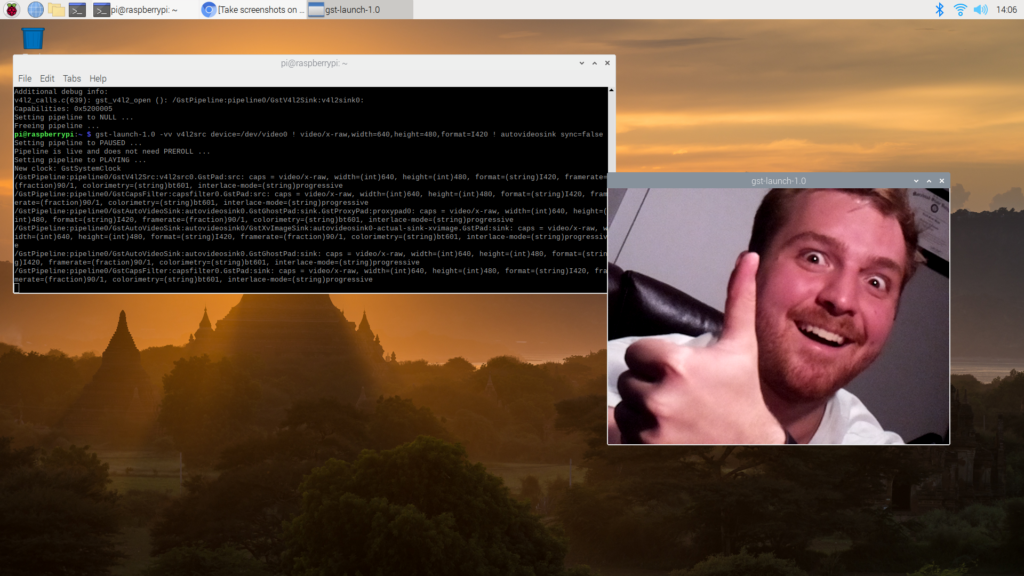
This validates that your camera works, and that the GStreamer installation is setup correctly. We can move on to setting up the RTSP server.
Setup GST-RTSP-SERVER
First, clone the gst-rtsp-server repository and cd into it:
git clone https://github.com/GStreamer/gst-rtsp-server.git
cd gst-rtsp-server
Next, we need to find the version of the GStreamer RTSP server library that we have and checkout the proper version of gst-rtsp-server. This is because typically the libraries for a given distribution are behind what is in the head of the git repo.
pkg-config --modversion gstreamer-rtsp-server-1.0
You should get an output similar to this:

So, my current version at the time of writing is 1.14.4. To checkout the correct version of the repo, use the following syntax:
git checkout [INSERT YOUR VERSION HERE]
In my case, it would be:
git checkout 1.14.4
Next, we want to build the test launch example:
cd examples
gcc -o test-launch test-launch.c `pkg-config --cflags --libs gstreamer-rtsp-server-1.0`
Setup a second PC
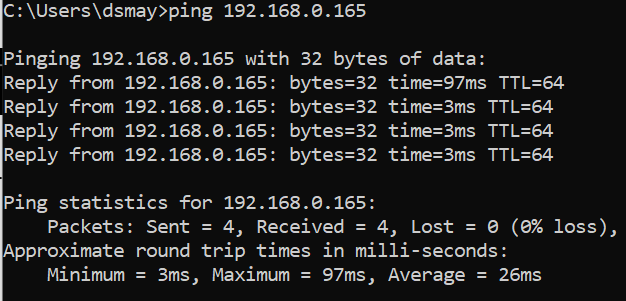
In your second PC, a good practice is to make sure you can see the Raspberry Pi to begin with by pinging it. To do that, you can use this command. It’s the same across most OSes:
ping [IP ADDRESS OF PI]
If your PC can see the Raspberry Pi, you will get replies like this:
Next, you will need to install something that can view the RTSP stream. I like VLC quite a bit, and will use it as the example for this tutorial.
Start the streaming!
In the same directory that you built test-launch in, run the following command:
./test-launch --gst-debug=3 "( v4l2src device=/dev/video0 ! video/x-raw, width=640, height=480, framerate=30/1 ! videoconvert ! queue ! x264enc tune=zerolatency ! rtph264pay name=pay0 pt=96 )"
You should see a status such as this:

Next, go to your second PC and open up VLC. Click the “Media” tab and select “Open Network Stream…”

Type in the following syntax:
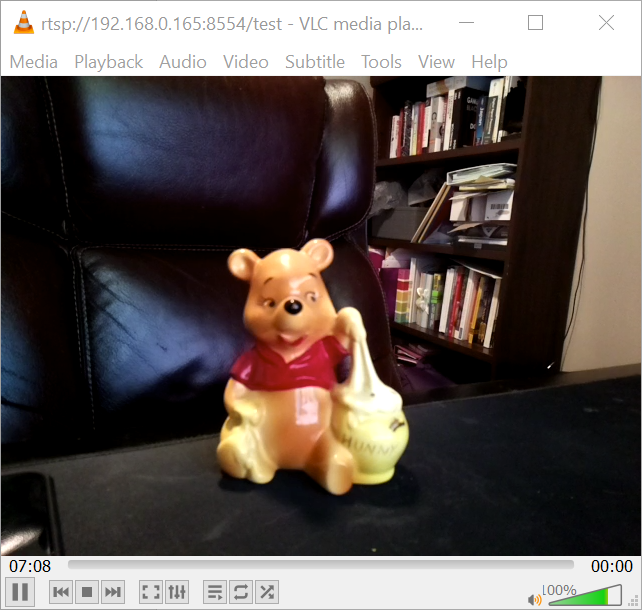
rtsp://[IP ADDRESS OF PI]:8554/test
In my case it is:
rtsp://192.168.0.165:8554/test
Then, press play. In your VLC window, you should see a stream of your Raspberry Pi Camera
General Notes
This tutorial was completed in August of 2021 and was tested to work at the time. The OS on my Raspberry Pi was Raspbian GNU/Linux 10 (buster). I used VLC 3.0.16 on a Windows 10 PC as the video client. The GStreamer Core Library Version was 1.14.4.